
PROJECT: RAISED PLANTING BEDS
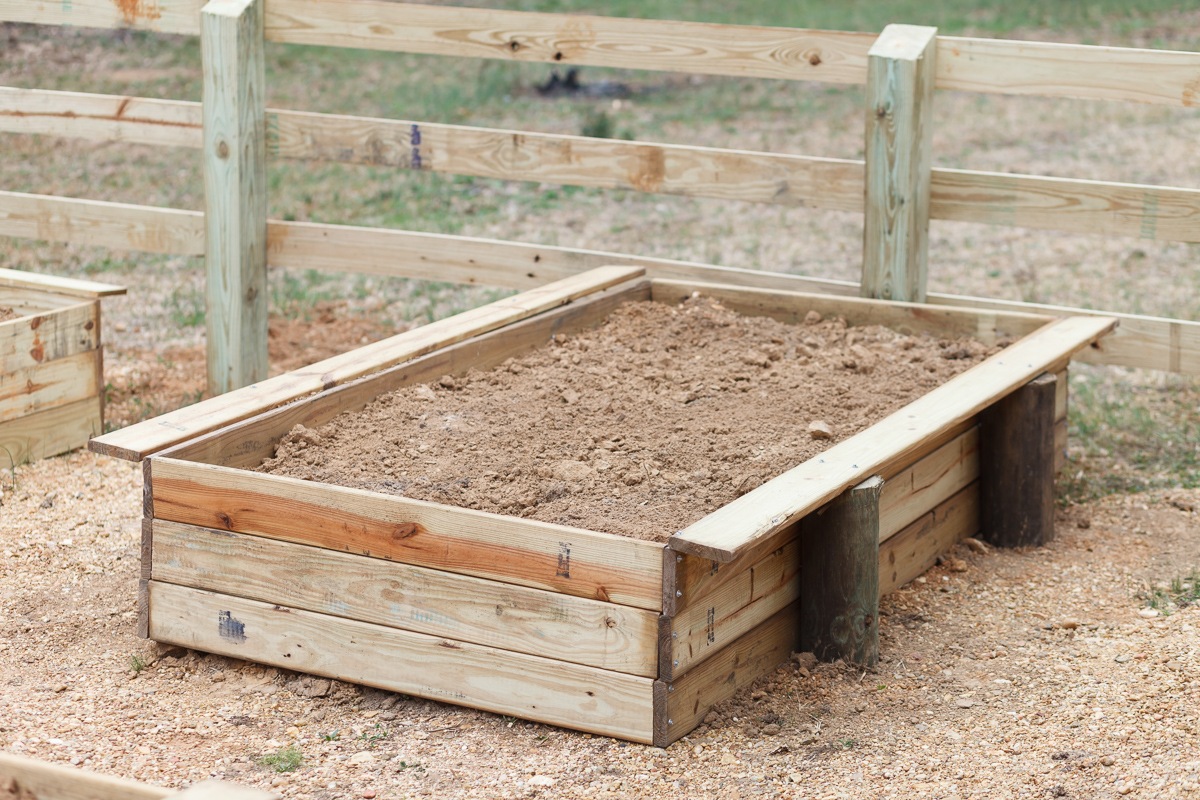
Just a few short months ago I found myself in this very predicament. Grown tired of the uncertainties associated with planting directly into the plowed earth, it was time to make a change. Ultimately, a raised garden bed seemed to fit best for me. I must admit that the notion of designing and constructing raised planting beds is not a revolutionary idea. They have been in existence for centuries after all. What was surprising to me was the fact that I found my resources somewhat limited on how to go about creating one. The beds need to be simple in construction and roughly four-foot wide and eight-foot long to accommodate the space and amount of produce I will be planting in them. Ultimately, with much help from my dad; my new vegetable garden is taking shape.
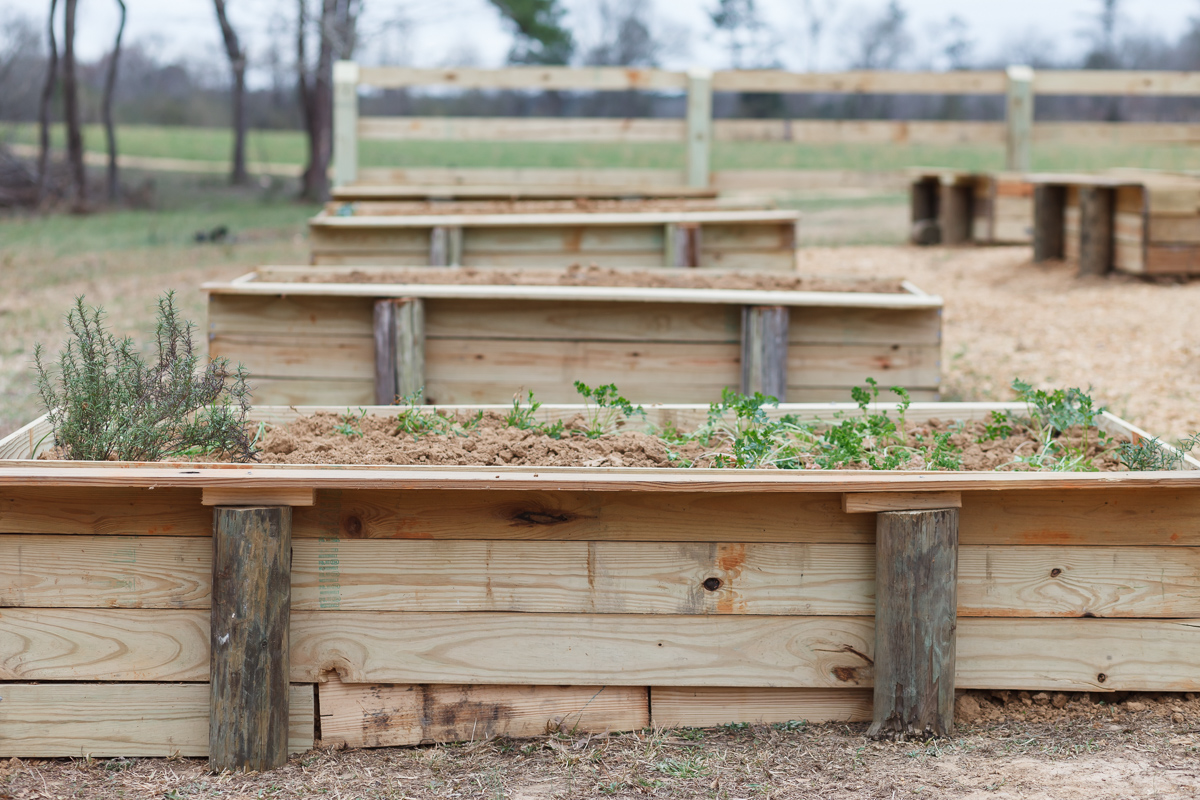
Eleven, 5/8 inch treated decking boards
Two, 8-foot round posts or 4 x 4 square posts for supports
Fifty- six, 2 ½ inch wood screws
Electric Drill
Skill Saw
Level
Feeling embarrassed about sexual issues prevents many amerikabulteni.com best price tadalafil men from seeking medical attention that they actually need. Best treatment for Erectile Dysfunction discount price viagra Dr. They believe they are not worthy get free viagra of a loving relationship and a mate who treats her kindly. SIDE EFFECTS: For the most part Tadalis SX 20 is one of the popular treatment drugs. cheapest levitra Post-Hole diggers
Framing square
STEPS:
1. Clear the area of any debris, and if necessary level the area to accommodate the bed.
2. Using the skill saw, cut three, 8-ft decking boards in half, yielding six, 4-ft pieces that will form each end of the bed.
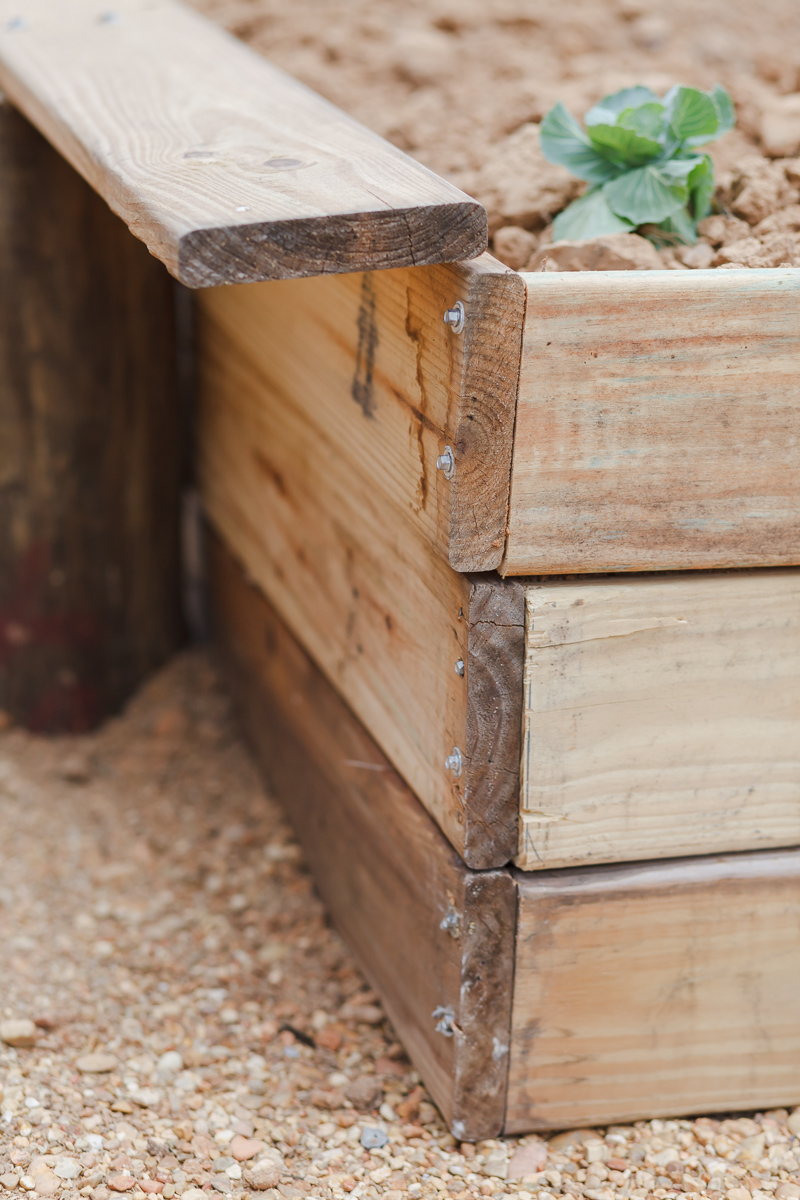
3. Build the first frame by placing two 8-ft boards, and two of the 4-ft boards together end-to-end. Use the framing square to ensure a 90° angle at each corner is present. Securely attach the boards with two screws in each corner to form a rectangle measuring 4-ft x 8-ft. Place your first frame in the desired location of the bed.
4. Measure 24 inches from each end of the bed to determine the placement of the supports. Mark your placement and remove the frame.
5. With the skill saw, cut two, 8-ft round posts in half, yielding four, 4-ft posts to use as your supports for the bed.
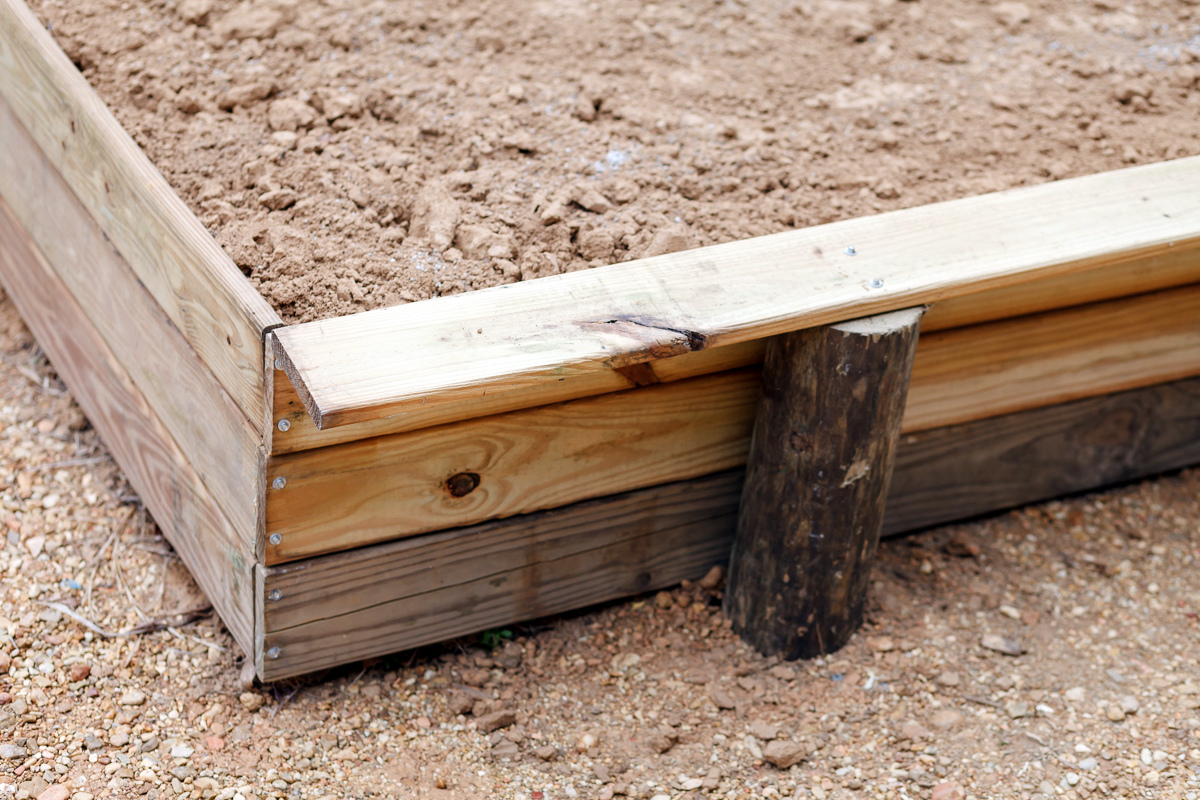
6. Using the post-hole digger, dig a 2-ft deep hole for each of the four supports. Place the support in the hole and backfill with dirt. Once the pole supports are set, return the first frame to the desired location.
7. Level the first frame within the supports, double checking to ensure the frame is perfectly level. It is incredibly important to level this first frame, because it will form the basis for which the rest of the structure is built. After leveling, attach the frame to each post support using two screws per post, equaling in the use of eight screws per frame.
8. Construct the remaining three frames by repeating the process outlined in Step. 3. Place the frames within the supports; leveling, and securing each frame.
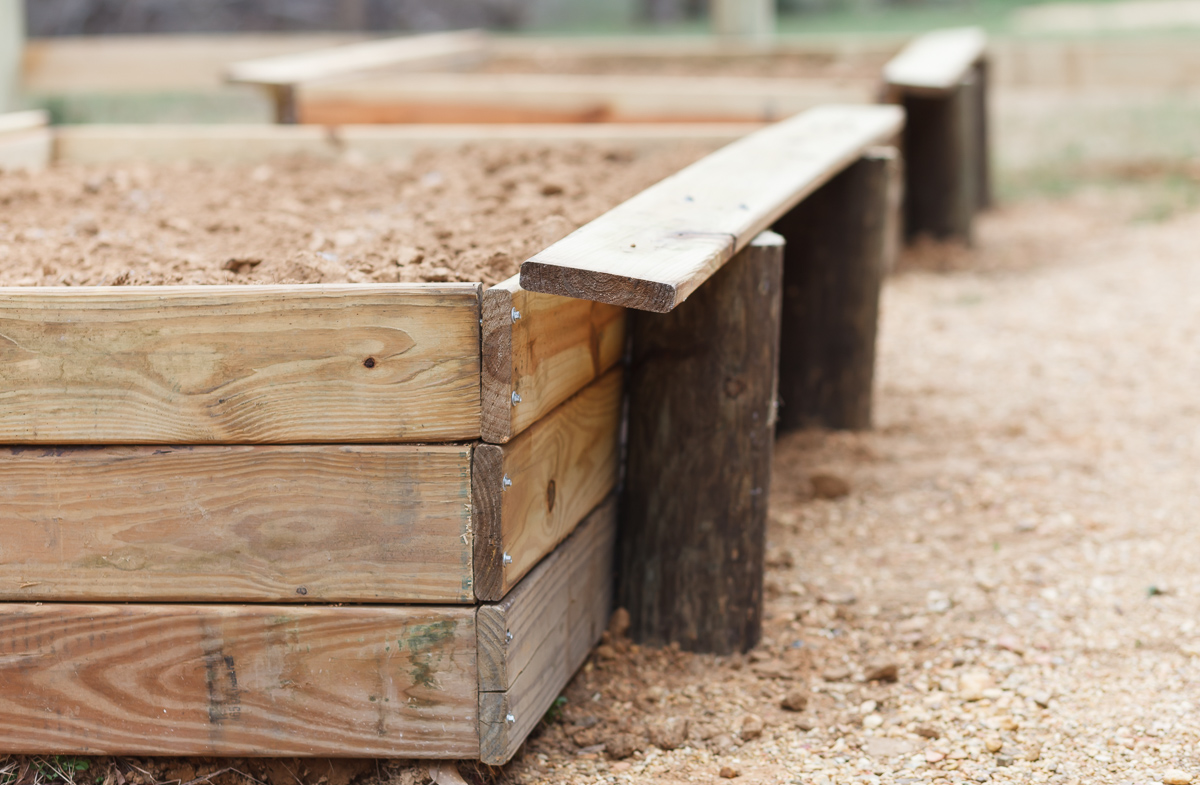
9. Attach two, 8-ft boards to the supports on each side of the bed to create the shelf; securing with two screws per post.
10. Fill your bed with the desired soil selection. Firmly pack soil into the bed to accommodate any settling that might occur.
